Push Notification is one of best way to interact with app users. Every mobile developer knows the importance of push notification in mobile apps. Push Notification provides near real-time updation of informations such as news,score updates,messages etc., to users. iOS provides APNS (Apple Push Notification Service) to send push notification data to applications installed on Apple devices. There are many third party push notification services are available like Parse,Urban airship, Carnival,Push woof etc. The benefits of using third party Push Notification service are,
- – Reduce Your code.
- – Save Your time and effort.
- – Manage the notifications easily.
This section will explain some simple steps to be followed to send push notification to iOS platform via Urban airship dashboard. The steps are given below.
- 1. Registration and login
- 2. Create Your first app in Urban airship
- 3. Set up your xcode project.
- 4. Send your first Push Notification
Registration and login
You need to create an account in Urban Airship using an email id and password. There are many pricing plans available. Select a pricing plan or select a free starter account. Click here to view the available account plans. After the successful registration, click manage your apps from Urban Airship dashboard to get started.
Create Your first app in Urban Airship
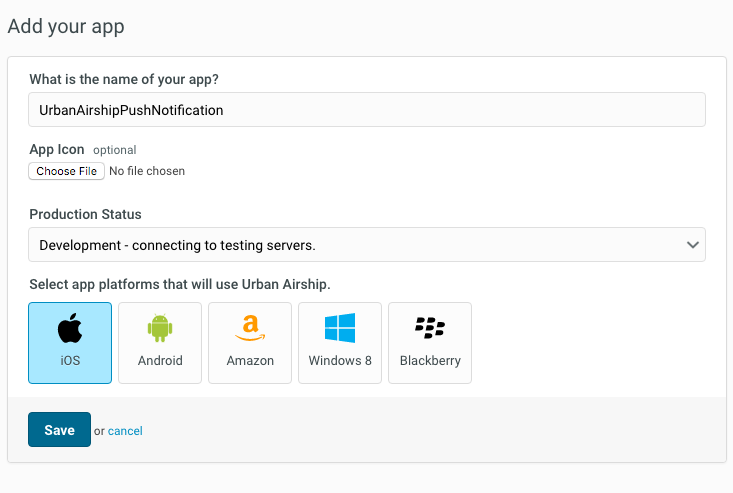
After the registration is completed, add your first app. You need to specify the following details to create an app.
App Name
The name of your app.
App Icon
Upload an app icon.
Production status
You must select whether your app is in development mode or production mode. When you are setting up development and production apps, you have to configure them for push services. See the APNS Setup documentation for detailed instructions.
Select Platform that will use Urban Airship
Select your platform here. The available platforms are iOS, Android, Windows, Blackberry etc.
After selecting the iOS app platform, save your app.
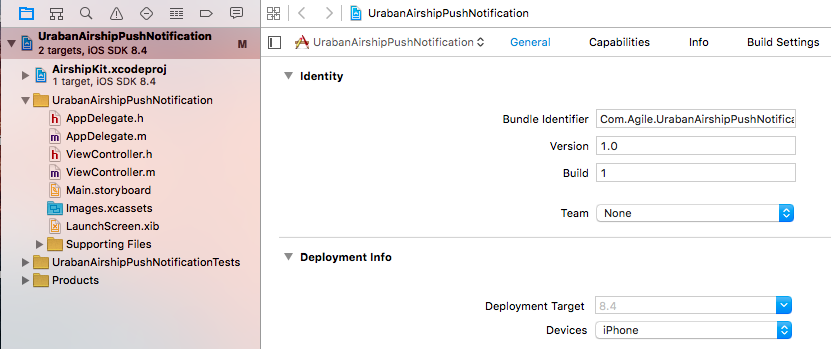
Set up your xcode project
You have created an app in previous section. Then you need to set up the xcode project. First, create an xcode project for push notification. Then you have to follow some steps to set up your project. The steps are explained below.
-
Download Urban airship SDK
Download the latest version of libUAirship from Urban Airship. Unzip the SDK and add the libUAirship static library and headers into your project. Click here to download the latest version of Urban Airship SDK.
-
Manage Build Settings
In the project’s build settings set “Enable Modules” field to “Yes” and “Link Frameworks Automatically ” to “Yes”.
-
Add Urban Airship SDK
The SDK can be included using the Urban Airship static library(iOS 7+) and Urban Airship Embedded framework(iOS 8+). The static library and embedded framework have different setup procedures.
Including Urban Airship SDK using Embedded framework(iOS 8+)
-Include Airshipkit
Add Airshipkit.XcodeProj into your app project in xcode.
-Link against embedded framework
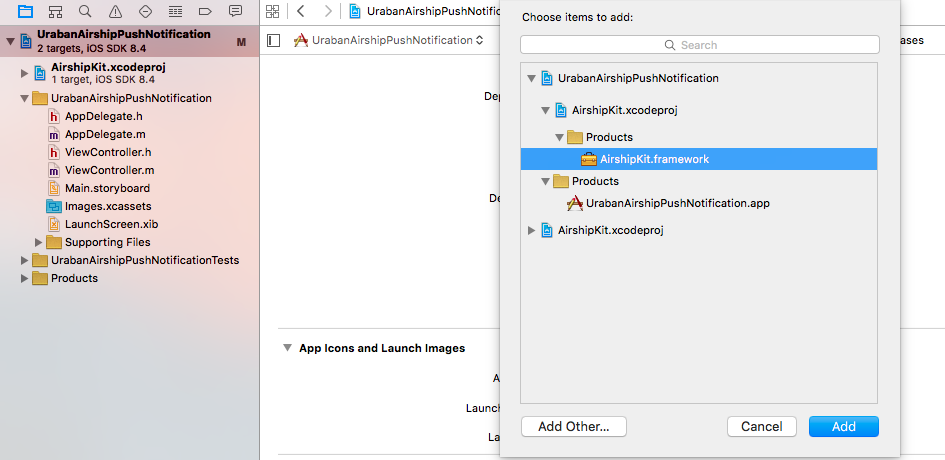
Add the Airshipkit.framework file to the Embedded binaries section in the general tab for your project to link against the embedded framework.
Including static library (iOS 7+)
– Search paths
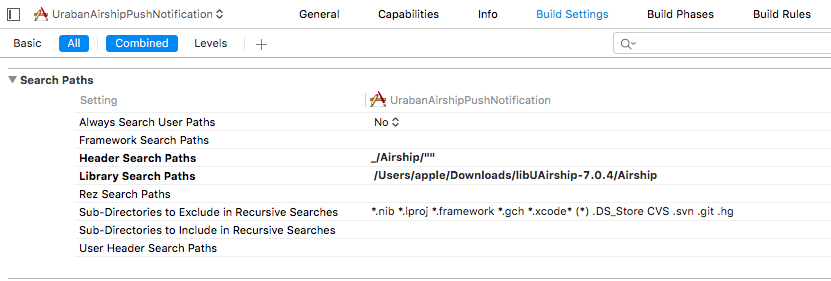
Ensure that your project’s header search paths under build settings include the Airship directory.
– Linker Flags
Add –objC –lz –lsqlite3 linker flag to prevent “Selector Not Recognized” runtime exceptions and to include linkage to libz and libsqlite3. The linker flag –force_load<path to library>/ libUAirship<version.a> may be used in instances where using the –objC linker flag is undesirable.

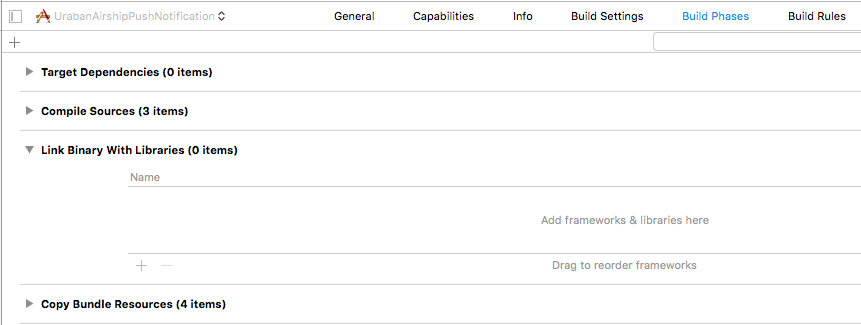
– Link against the static library
In the libraries section in the Build Phases, add the libUAirship.a file to the link binary to link against the static library.
– Add the Urban Airship resource bundle
Add the UrbanAirshipResources.Bundle file to the Copy Bundle Resources section in the Build Phases tab for your target.
-
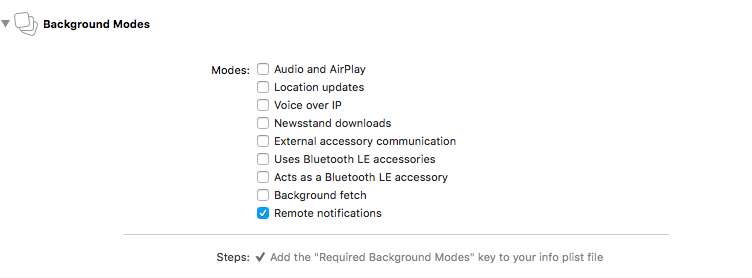
Enable Background Notification
You can enable Background notification by enabling Remote notifications of Background mode under the target’s capabilities section.
-
Create AirshipConfig.plist
To manage your production and development application profiles, the Urban Airship SDK uses a .plist configuration file named AirshipConfig.plist. You can create two application within your Urban Airship account:one for development and one for production. Create an AirshipConfig.plist and set the following values in your .plist file.
<?xml version="1.0" encoding="UTF-8"?>
<!DOCTYPE plist PUBLIC "-//Apple//DTD PLIST 1.0//EN"
"http://www.apple.com/DTDs/PropertyList-1.0.dtd">
<plist version="1.0">
<dict>
  <key>detectProvisioningMode</key>
  <true/>
  <key>developmentAppKey</key>
  <string>Your Development App Key</string>
  <key>developmentAppSecret</key>
  <string>Your Development App Secret</string>
  <key>productionAppKey</key>
  <string>Your Production App Key</string>
  <key>productionAppSecret</key>
  <string>Your Production App Secret</string>
</dict>
</plist>- Import the required header files
Import the AirshipKit header files to your application delegate.
Import AirshipKit (Swift)
#import<AirshipKit/ AirshipKit.h>
You must import the individual headers if your application uses the static library.
#import “UAirship.h”

#import “Uaconfig.h”

#import “UAPush.h”-
Starting Urban Airship Services
Inside your application delegate’s application:didFinishLaunchingWithOptions:method,initialize a shared Uairship instance by calling Uairship takeoff.This will bootstrap the Airship SDK.
-(BOOL)application:(UIApplication*)
didFinishLaunchingWithOptions:(NSDictionary*)launchOptions
{

         [Uairship takeOff:config];
}-
Retrieving your channel ID
The channel ID is a unique identifier used to target pushes to a specific devices using the Urban Airship API.You can always get the channel ID using the following code.
ObjC:
            NSString *Channelid=[Uairship push].channelID;
            NSLog(@”My channelID:%@”, Channelid);
Swift:
            Let Channelid=Uairship.push().ChannelId
            print(”My channelID:%@”, Channelid)
ChannelID initially comes back as NULL on your apps first run.It will be created and persisted during registration.
-
Enabling User Notifications
By default User notifications are disabled.To enable notification write the following code. Set the user notification types on [Uairship push]. Sounds, alerts and badges are the default types. The library will register to receive notification after the user push notifications are enabled.
[UAirship push].userNotifictionTypes=(UIUserNotificationtypeAlert| UIUserNotificationtypeBadge|UIUserNotificationtypeSound)
[Uairship push].userpushNotificationEnabled=YES;
After all this steps your project’s AppDelegate.m file looks like below
AppDelegate.m

#import <AirshipKit/AirshipKit.h>

#import “AppDelegate.h”

@interface AppDelegate ()

@end

@implementation AppDelegate

-(BOOL)application:(UIApplication*)

didFinishLaunchingWithOptions:(NSDictionary*)launchOptions

{
         [Uairship takeOff:config];

         //Set the icon badge to zero

         [[Uairship push]resetBadge];

         [UAirship push].userNotifictionTypes=(UIUserNotificationtypeAlert|

         UIUserNotificationtypeBadge|UIUserNotificationtypeSound)

         [Uairship push].userpushNotificationEnabled=YES;

}
Send your first push Notification
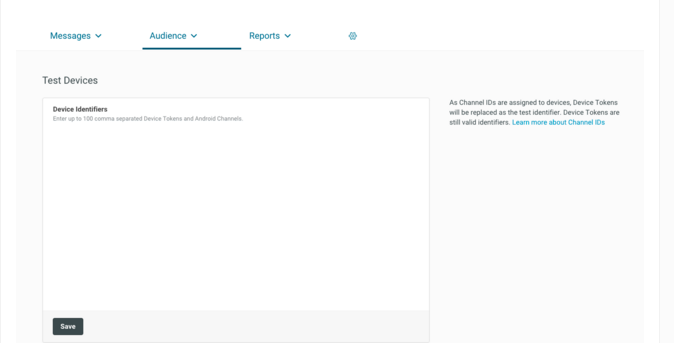
- Adding Test Devices
You need to add a list of test devices in Urban airship console before sending your first notification. To setting up test devices, select Audience. You can see a text box for entering list of device identifiers. You can enter up to 100 device identifier here. After entering the device identifiers save the list.
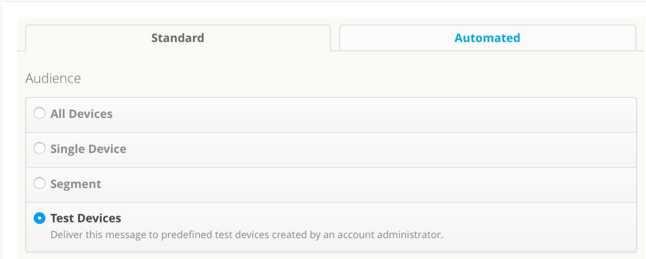
To send your first push notification,navigate to Messages Overview ,located under the Messages tab,and click + Messages. You can see a Message box here and type your notification message here. Before sending the notification you have to select the audience and delivery options. The audience are,
All Devices
Single Device
Segments
segments are groups of audience that you can create using combinations of location,tags and lists.
Test Devices
Test devices are predefined devices created by an account administrator.
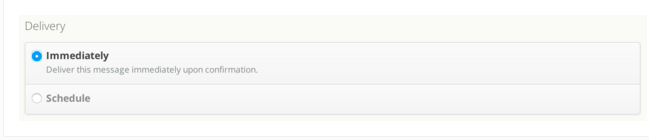
Select an audience from the list. Then navigate to the delivery section and you can see two options here.
Immediately
Deliver the message immediately.
Schedule
Deliver the messages according to the scheduled time
If all has been set up correctly,click Confirm and Send Now.
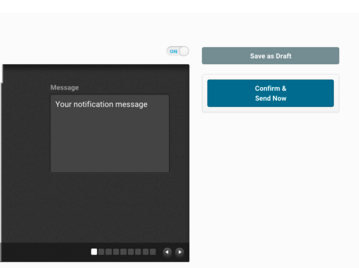
You have sent your first push notification!!!